Protofire Safe — Beginner’s Guide
Protofire Safe is a fork of Safe{Wallet} maintained by DPL team from Protofire, deployed across a range of EVM-compatible networks including Plasma, Tempo, Moca and Blast.
What is Safe?
Safe (formerly Gnosis Safe) is a smart contract wallet that requires multiple approvals before any transaction can be executed. Unlike a regular wallet controlled by a single private key, Safe uses a multisignature (multisig) model:
- You define a group of owner addresses (signers).
- You set a threshold — the minimum number of signers required to approve a transaction.
- A
2-of-3Safe, for example, needs any 2 of its 3 owners to sign before anything moves.
Here’s what that means in practice:
- One key compromised — with a regular wallet, funds are stolen. With Safe, the attacker still needs more signers.
- One key lost — with a regular wallet, funds are gone forever. With Safe, remaining signers can still operate.
- Insider attack — a regular wallet has no protection. Safe requires collusion from threshold-many signers.
- Accidental transaction — a regular wallet has no undo. Safe requires threshold approval before execution.
Protofire Safe extends this security model to additional EVM networks not available on the official Safe{Wallet} deployment.
Before You Start
You need:
- A Web3 wallet (MetaMask, Ledger, Trezor, or any WalletConnect-compatible wallet) for each intended signer.
- Native tokens for gas on the network you plan to use — creating a Safe requires one on-chain transaction.
- Addresses of all intended co-signers collected before you begin.
Open the Protofire Safe interface in your browser.
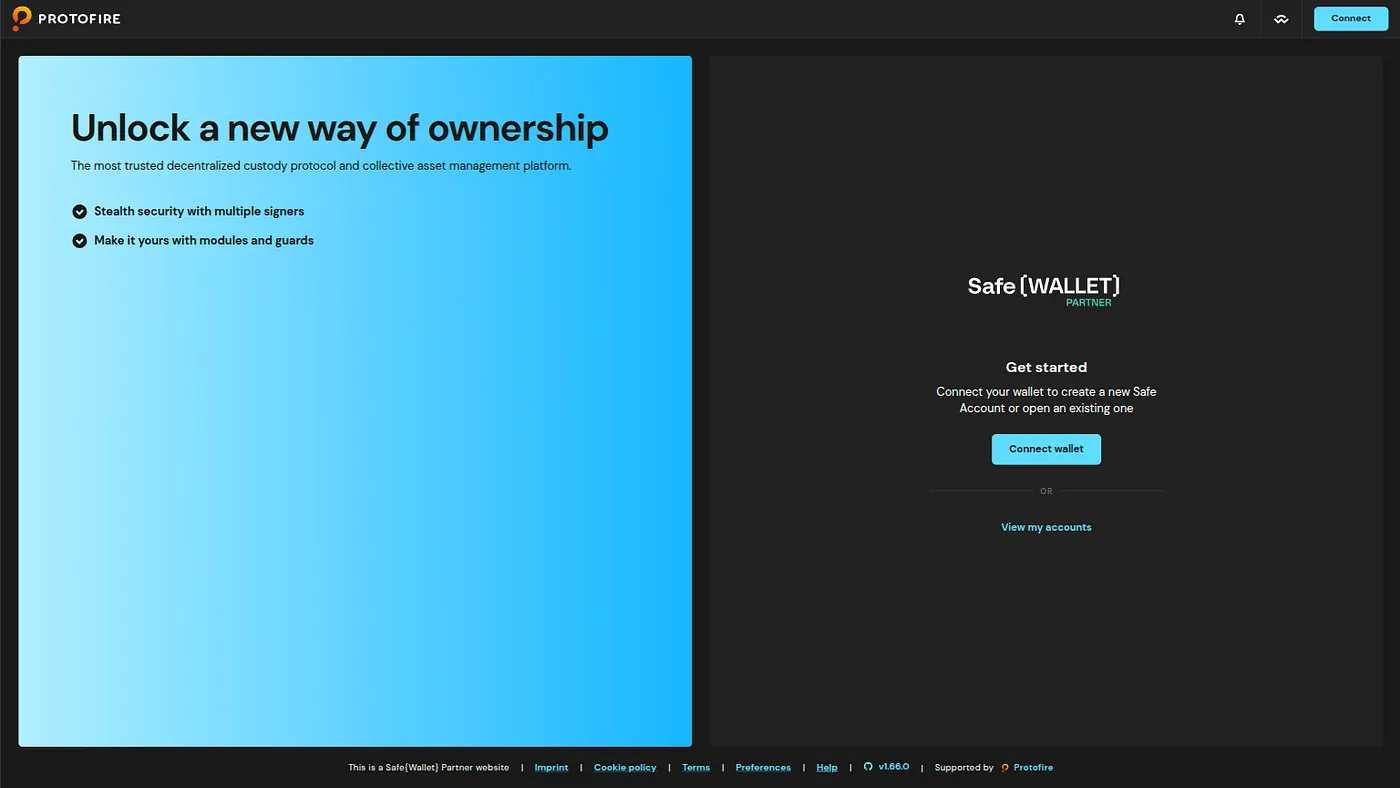
Press enter or click to view image in full size.
Click Connect Wallet and choose your wallet provider.
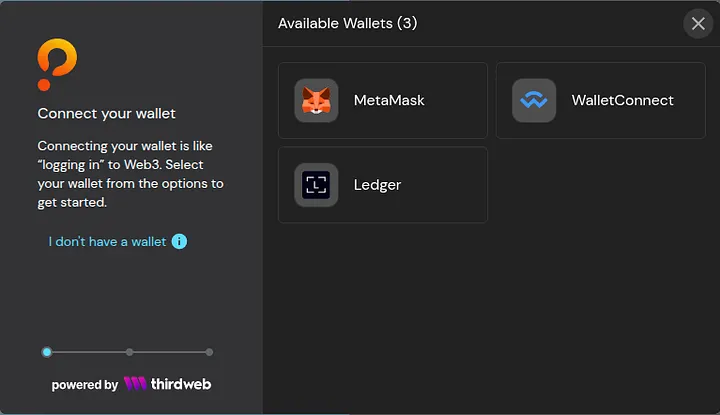
Press enter or click to view image in full size.
After connecting, check the network shown in the top-right corner. If it doesn’t match where you want to deploy, switch networks in your wallet — Safe will update to match.
Creating a Safe
Step 1 — Start the setup wizard
Click Create account on the home screen.
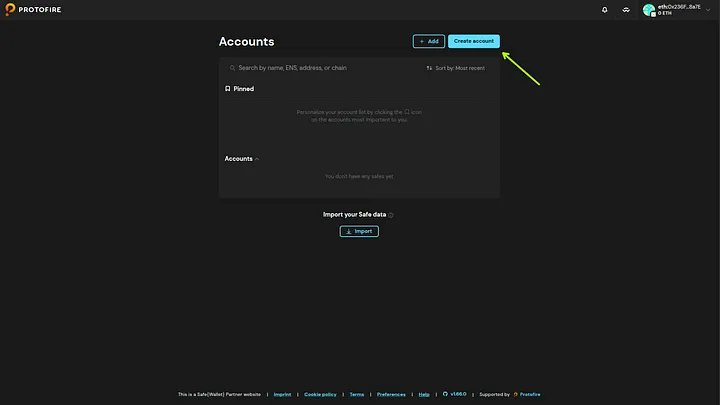
Press enter or click to view image in full size.
Step 2 — Name your Safe
Give your Safe a name. It’s stored locally in your browser and is only visible to you.
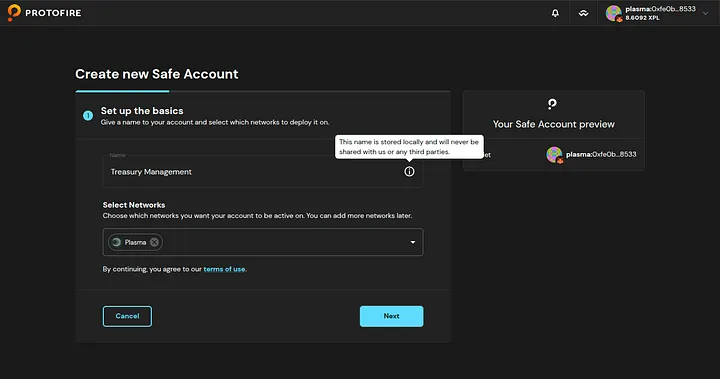
Press enter or click to view image in full size.
Click Next.
Step 3 — Add signers and set the threshold
Add the address of each signer and set the threshold — how many of them must sign before any transaction executes. Your connected wallet appears as the first signer by default. Click Add new signer for each additional owner.
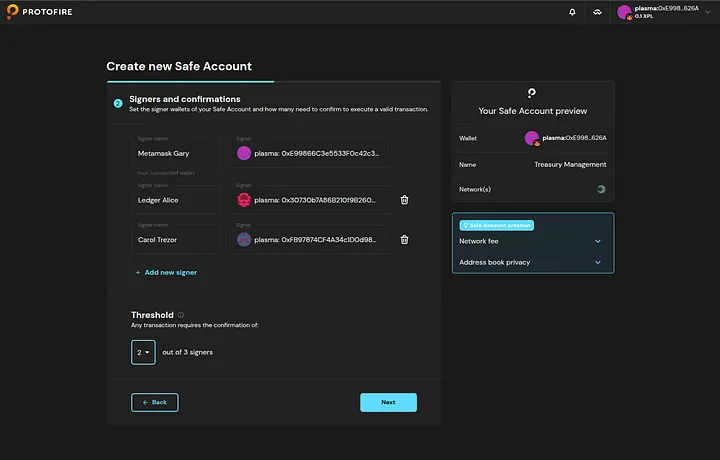
Press enter or click to view image in full size.
Give each signer a recognisable label (e.g. “Alice — Ledger”, “Bob — MetaMask”). Labels are stored locally and make it easy to track who has signed.
Click Next.
Step 4 — Review and deploy
Before deploying, verify:
- Network — correct chain selected.
- Owners — all addresses are correct, double-check every character.
- Threshold — matches your intended policy.
- Estimated gas — you have enough native tokens to cover it.
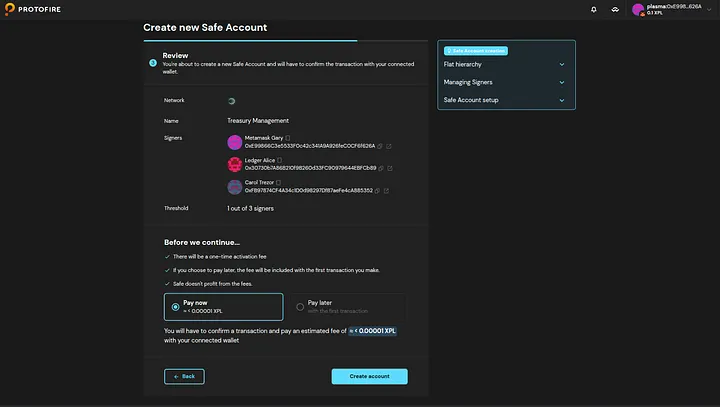
Press enter or click to view image in full size.
Click Create — your wallet will ask you to sign the deployment transaction.
Step 5 — Wait for confirmation
The transaction confirms on-chain, usually within 30 seconds. You’ll see a loading screen in the meantime.
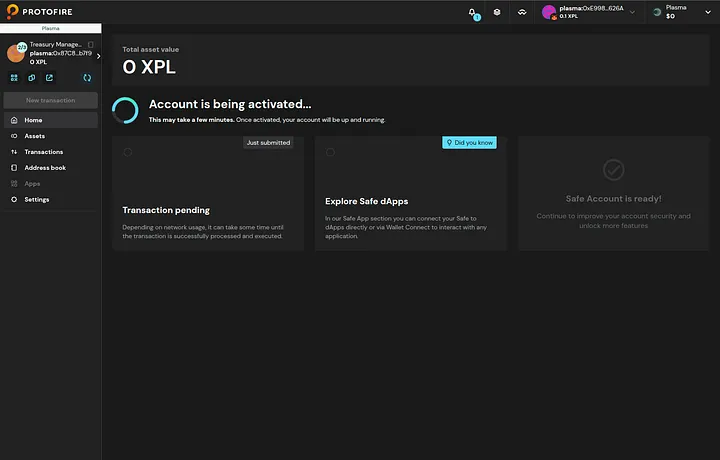
Press enter or click to view image in full size.
Once confirmed, Safe opens your new dashboard.
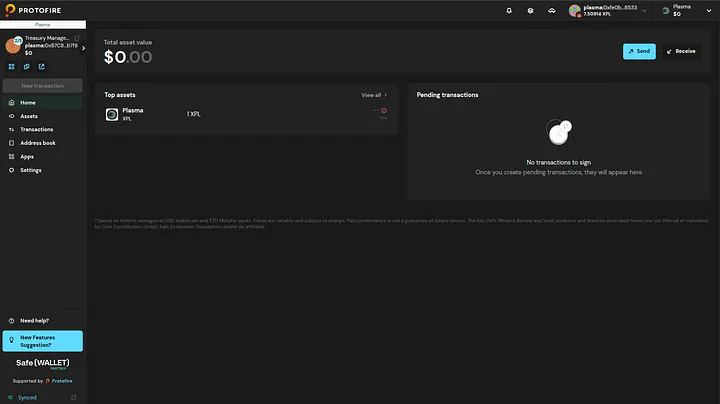
Press enter or click to view image in full size.
Copy your Safe address and share it with your co-signers so they can connect to it from their own browsers.
Setting Up a Reliable Signer Structure
The signer configuration is your security model.
Choosing a threshold
- Personal Safe (extra security layer) — 1-of-1 (adds smart contract features) or 1-of-2 (hot + cold key).
- Small team treasury (2–4 people) — 2-of-3.
- Larger team or high-value treasury — 3-of-5 or higher.
- DAO or protocol treasury — often 4-of-7 or more.
Rule of thumb: keep the threshold above half the total owners so no simple majority can act unilaterally, but low enough that you aren’t blocked whenever one signer is unavailable.
Signer device diversity
Don’t put all your signers on the same device type or under one person’s control:
Key storage
- Hardware wallets (Ledger, Trezor, GridPlus Lattice) for any signer holding significant assets.
- Different seed phrases for each signer — never derive multiple signer keys from one mnemonic.
- Offline backup of every seed phrase in a physically separate location.
- No cloud storage (Google Drive, iCloud, Dropbox) of private keys or seed phrases.
Adding or removing signers later
The owner list and threshold can be changed after deployment, but that change itself requires the current threshold to be met:
Settings → Safe account settings → Owners → Add owner / Remove owner
Every change is an on-chain transaction and costs gas.
Proposing a Transaction
Any owner can propose a transaction. It’s stored off-chain in the Safe Transaction Service and immediately visible to all other owners.
Native token transfer example
- Click New transaction → Send tokens from your Safe dashboard.
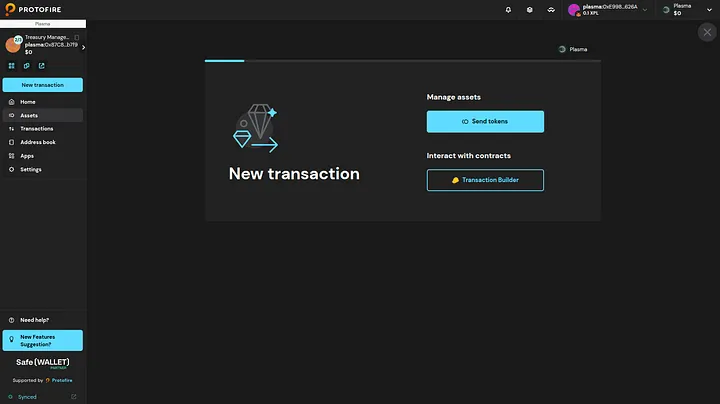
Press enter or click to view image in full size.
2. Fill in the recipient address and amount.
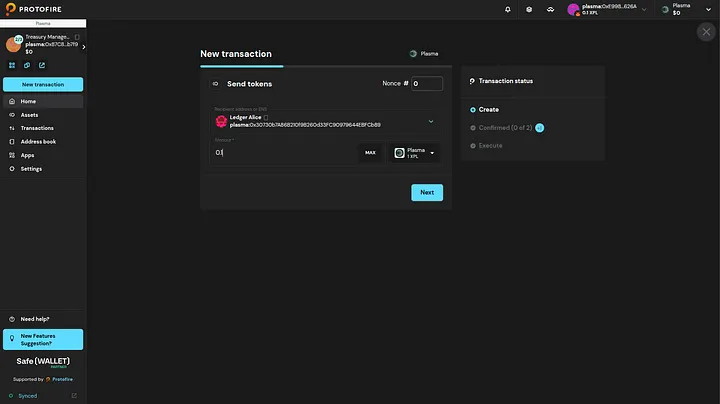
Press enter or click to view image in full size.
3. Click Next, then Sign — this submits the proposal and adds your signature.
Signing here is gas-free: it creates an off-chain EIP-712 message. No on-chain transaction happens yet — only the final execution step costs gas.
Signing a Transaction
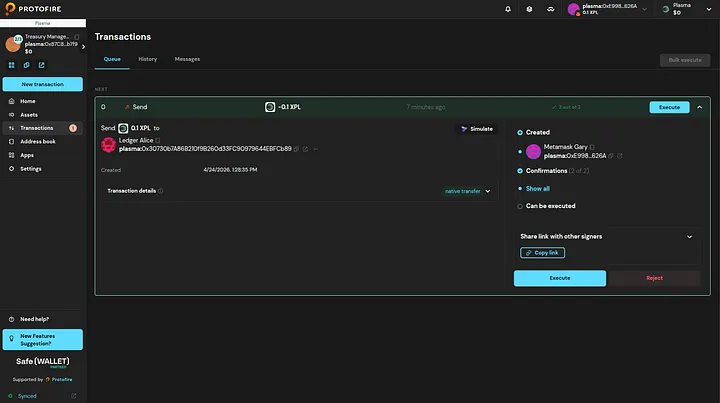
Co-signers find the pending transaction in Transactions → Queue.
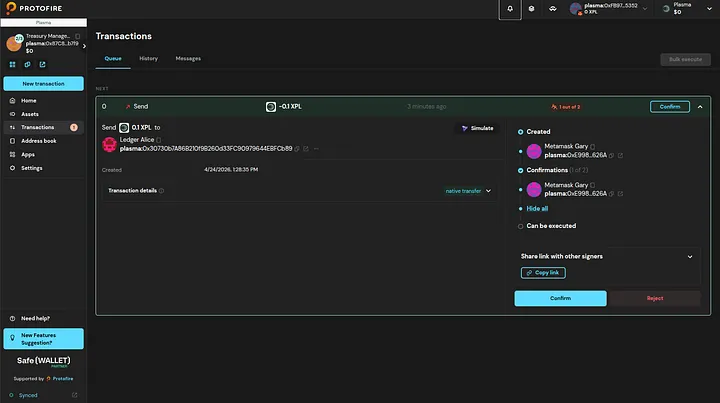
Press enter or click to view image in full size.
- Click the transaction to open its details.
- Review every field: recipient, value, data (if any), and nonce.
- Click Confirm.
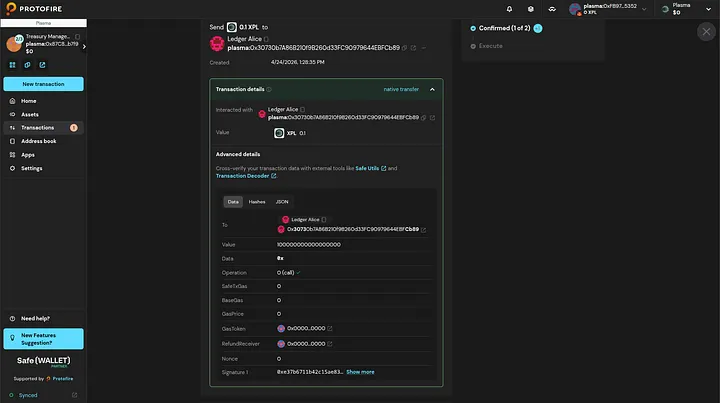
Press enter or click to view image in full size.
4. Your wallet opens with the EIP-712 structured data message. On MetaMask it looks like:
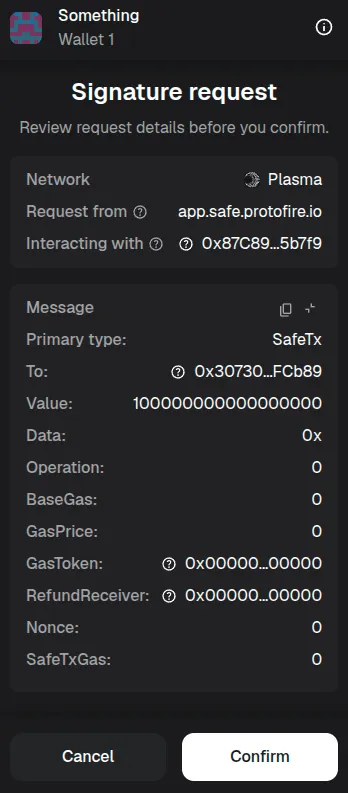
5. Check that the values match what you saw in Safe, then click Sign.
No gas is spent. Repeat until the threshold is reached.
Executing a Transaction
Once enough signatures are collected (≥ threshold), an Execute button appears on the transaction.
Press enter or click to view image in full size.
Any owner — or any address with enough gas — can execute:
- Click Execute.
- Review the gas estimate.
- Confirm in your wallet — this is an on-chain transaction and costs gas.
After the transaction mines, it moves from Queue to History with a link to the block explorer.
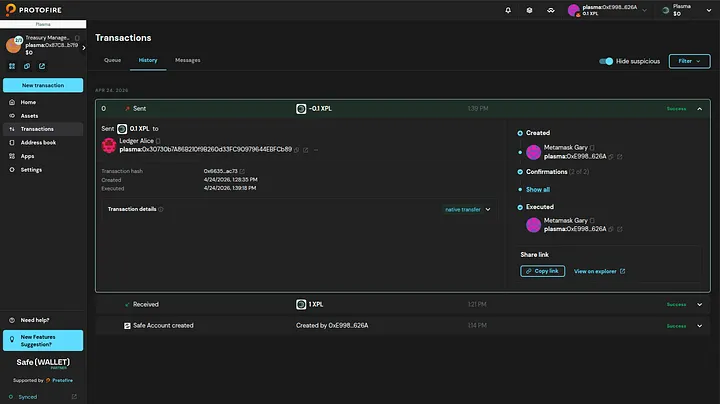
Press enter or click to view image in full size.
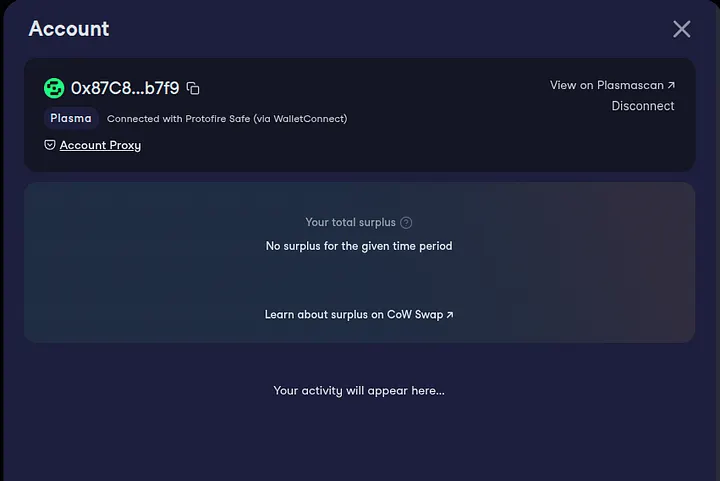
Connecting to dApps via WalletConnect
WalletConnect lets you use your Safe as the wallet on any external dApp — DeFi protocols, governance platforms, NFT marketplaces — the same way you’d connect MetaMask, but with multisig security behind every action.
How it differs from a regular wallet
When you confirm an action in a dApp connected to MetaMask, it executes immediately. With Safe it doesn’t — the dApp sends a proposal to your Safe queue, and the transaction only goes on-chain after the threshold of signers approve it and someone executes it. A few practical consequences:
- The dApp may appear to hang after you confirm — it’s waiting for a tx hash that won’t arrive until Safe executes.
- Time-sensitive transactions (swaps with short deadlines, liquidation triggers) can expire before the threshold is reached. Make sure co-signers are reachable before initiating.
Step 1 — Open the WalletConnect panel
Click the WalletConnect icon in the Safe left sidebar or top navigation.
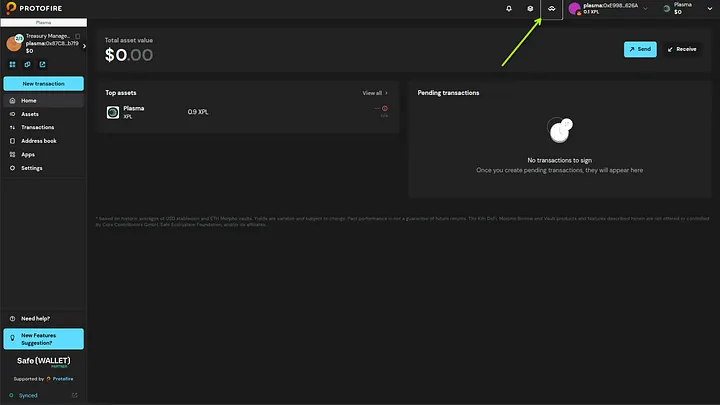
Press enter or click to view images in full size.
Step 2 — Get the connection URI from the dApp
In the dApp, click Connect Wallet and choose WalletConnect. The dApp displays either a QR code or a URI starting with wc:. Copy the full URI string by clicking Copy icon.
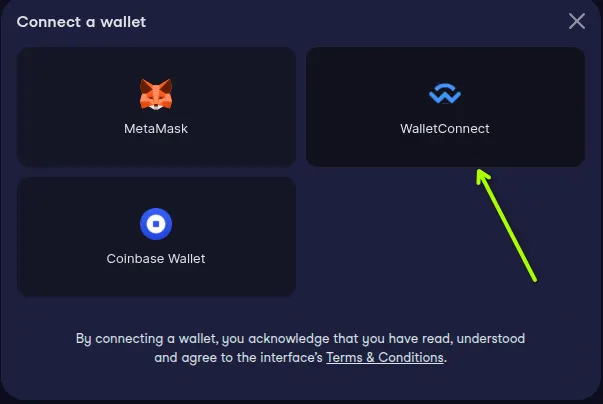
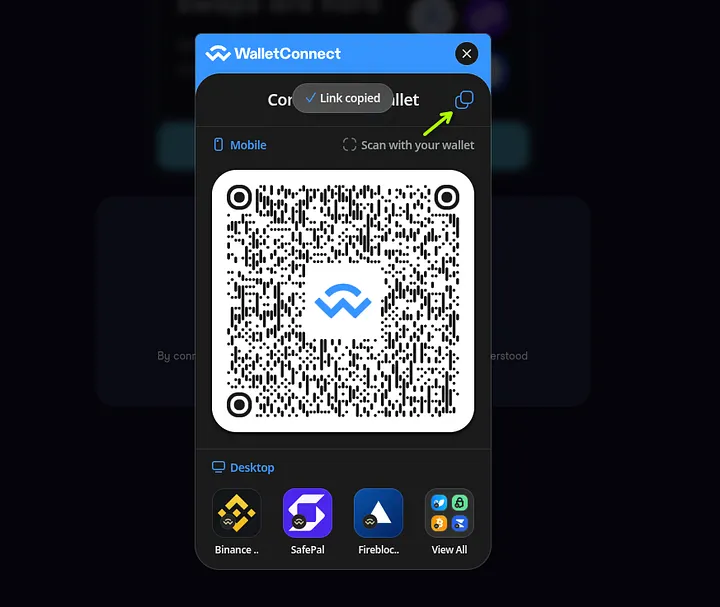
Press enter or click to view images in full size.
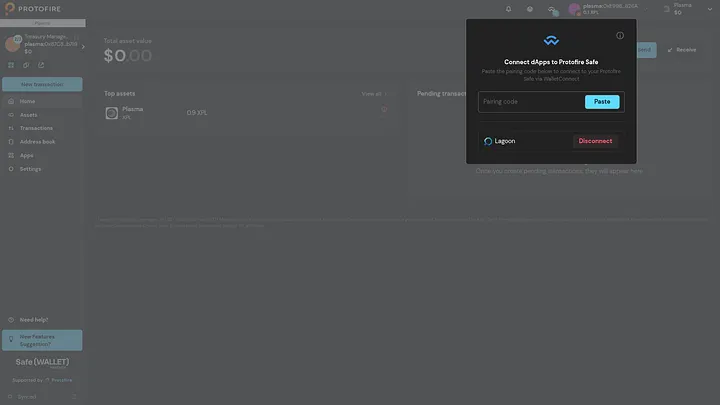
Step 3 — Paste the URI into Safe
Paste the URI into the WalletConnect panel and click Connect (or press Enter). The pairing completes automatically and the dApp shows your Safe address as the connected wallet within a few seconds.
Press enter or click to view image in full size.
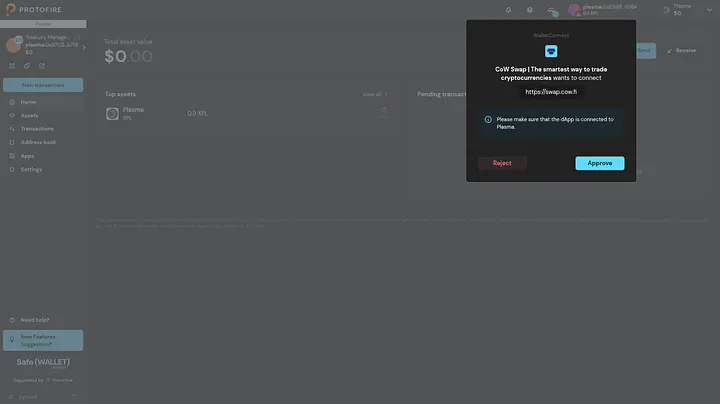
Step 4 — Interact with the dApp
Use the dApp as you normally would. When you confirm an action, the dApp sends a transaction request to Safe.
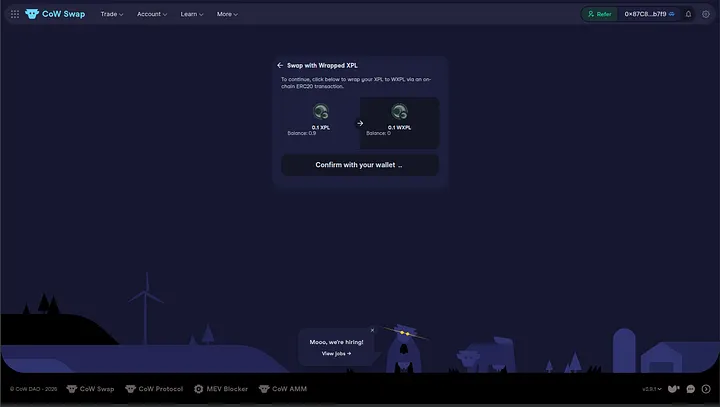
Press enter or click to view image in full size.
Step 5 — Approve the transaction in Safe
The transaction appears in Transactions → Queue, just like any other proposal.
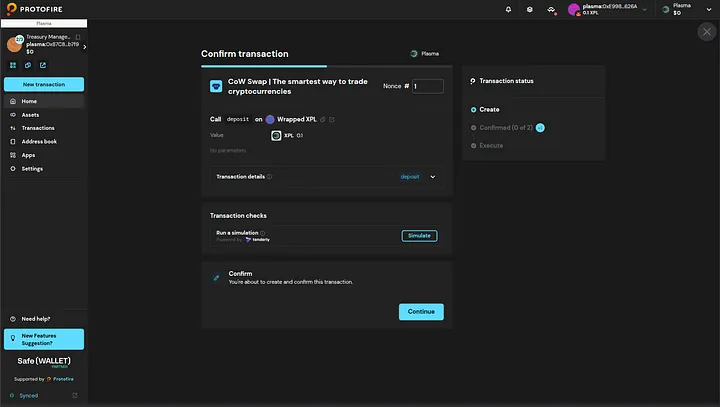
Press enter or click to view image in full size.
Check these fields before signing:
- To — should be the dApp’s contract (e.g. Uniswap router, Aave lending pool), not an unknown address.
- Value — native tokens being sent; 0 for most ERC-20 interactions.
- Data — hex calldata for the function call. If you don’t recognise it, decode it on a block explorer first.
Collect signatures and execute following the same steps described in the Signing and Executing sections above.
Managing active connections
Reopen the WalletConnect panel to see all paired sessions.
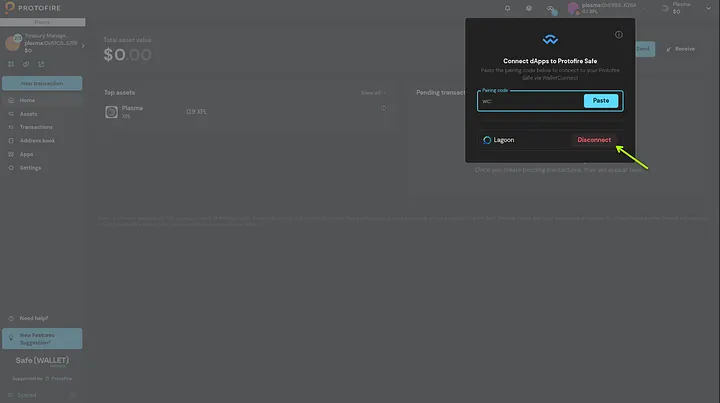
Press enter or click to view image in full size.
Disconnect sessions you’re not actively using — an open session is a channel a compromised dApp could use to push transactions into your queue.
Compatibility notes
Not every dApp handles Safe’s async signing gracefully:
- dApp spins forever after you confirm — it’s waiting for an immediate tx hash. Wait for Safe to execute, then refresh the dApp.
- dApp reports “transaction failed” straight away — it timed out before the threshold was reached. Get co-signers to sign faster, or consider a lower threshold for time-sensitive ops.
- No WalletConnect option in the dApp — it supports injected wallets only. Use the Safe Apps browser instead (see below).
- Session drops unexpectedly — WalletConnect v1 sessions expire. Reconnect with a fresh URI from the dApp.
Safe Apps browser
For dApps natively integrated with Safe, use the Apps section in the sidebar instead of WalletConnect. They run inside Safe’s built-in browser and handle the multisig flow more reliably than an external WalletConnect session.
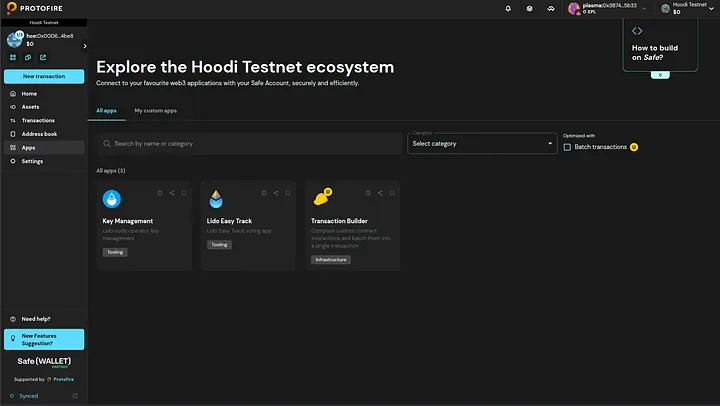
Press enter or click to view image in full size.
Validating Transactions with Safe Utils
Safe Utils is a Protofire tool that independently calculates Safe transaction hashes using EIP-712. Use it to confirm that the hash your hardware wallet displays matches the transaction parameters you reviewed in the UI.
Why bother?
Hardware wallets show a raw hash, not the human-readable parameters. Safe Utils recomputes that hash from scratch so you can verify nothing was changed between the UI and the signing request.
Step by step
Step 1 — Open Safe Utils
Go to safeutils.protofire.io.
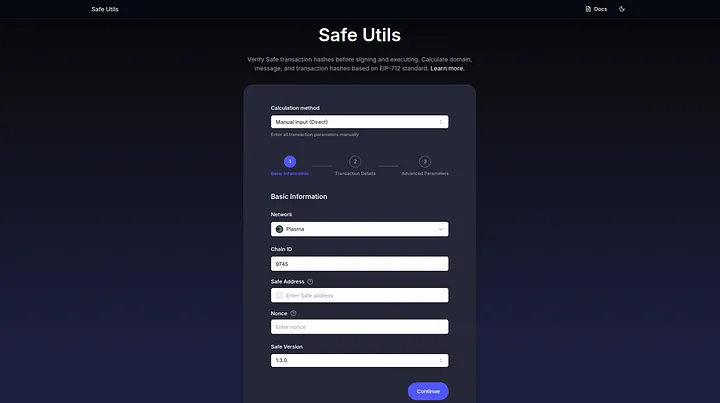
Press enter or click to view image in full size.
Step 2 — Select the network
Pick the network your Safe is deployed on.
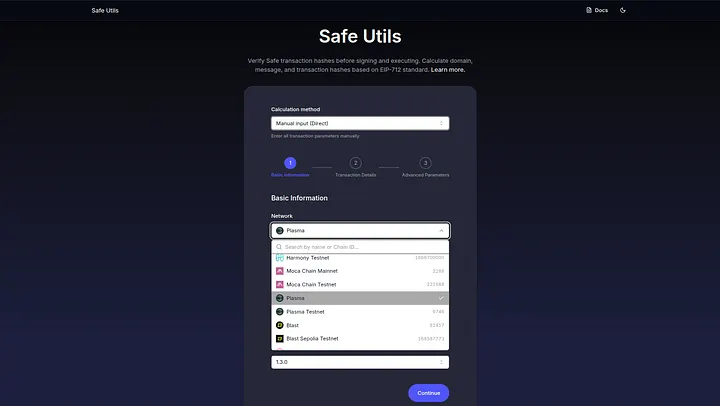
Press enter or click to view image in full size.
Step 3 — Load the transaction
The quickest way: enter your Safe address and the transaction nonce (visible in the Safe UI transaction details). Safe Utils fetches the parameters from the Safe Transaction Service automatically.
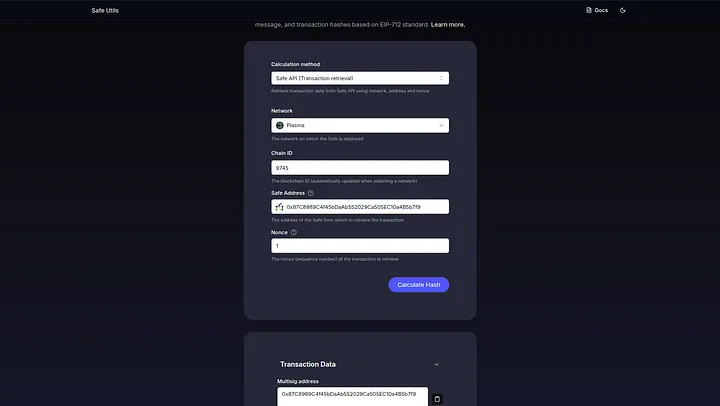
Press enter or click to view image in full size.
Alternatively, switch to manual input and fill in each field:
- Safe address — your Safe’s address.
- To — recipient address.
- Value — amount in wei (ETH × 1⁰¹⁸).
- Data — hex calldata (
0xfor plain transfers). - Operation — 0 = Call, 1 = DelegateCall.
- safeTxGas, baseGas, gasPrice — usually 0.
- gasToken —
0x000…000for native token. - refundReceiver —
0x000…000. - Nonce — transaction nonce from Safe UI.
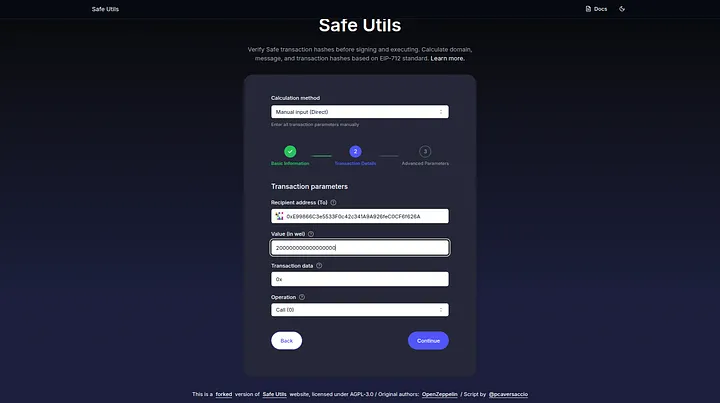
Press enter or click to view image in full size.
Step 4 — Compare the hashes
Click Calculate. Safe Utils shows:
- Domain Hash — derived from the Safe contract address and chain ID.
- Message Hash — derived from the transaction parameters.
- Safe Transaction Hash — the hash your hardware wallet will display.
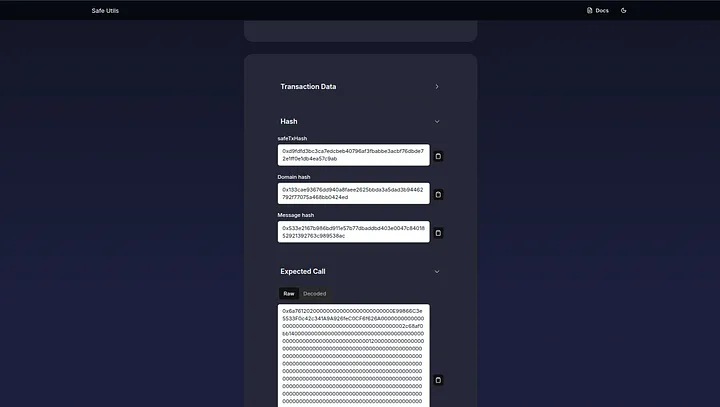
Press enter or click to view image in full size.
Cross-check the Safe Transaction Hash against:
- The hash shown on your hardware wallet screen.
- The
safeTxHashin Safe UI's transaction details.
All three must match. If anything differs, stop — don’t sign until you know why.
Troubleshooting
“Not enough signatures” when trying to execute
The transaction hasn’t reached the threshold yet. Share the transaction link with remaining co-signers and ask them to confirm.
Wrong network in Safe Utils
The Domain Hash encodes the chain ID, so a wrong network selection will always produce a wrong hash. Select the same network your Safe is on.
Transaction stuck in queue
Safe executes nonces sequentially — a transaction with a lower nonce must go first. Check whether an older pending transaction is blocking the queue.
A signer lost their key
If you still have enough active signers to meet the threshold, submit an owner removal transaction via Settings → Safe account settings → Owners → Remove owner. If you’ve lost enough keys to fall below the threshold, the Safe is permanently locked.
Hardware wallet shows an unreadable hash
Hardware wallets show the final EIP-712 hash, not the raw parameters. Use Safe Utils to independently verify it (see the Validating Transactions section above).
Share this article on
Share this article on